
In a previous post, we talked about what SVG files are, and how they work with cutting machines like Cricut and Silhouette. In this post, we’ll take it a step further and explore 6 different types of SVG cut files that designers can create, and how each one can be used for crafting, depending on the project and the materials being used.
Whether you’re just starting to design SVGs, or an established digital designer looking to expand your shop offerings; understanding the different types of SVG cut files is key to creating cut file designs that are easy to use. The way you structure a file – how many layers it has, and how it’s intended to be cut and assembled, can make a big difference in the crafting experience.
In this post, we’ll walk through the different types of SVG cut files you can design for cutting machines, and by the end, you’ll know what each type is and how they are used for crafting.
What are the Different Types of SVG Cut Files for Crafting?
As an SVG designer, understanding the different kinds of cut files used in crafting is key to designing SVG files that are easy for crafters to work with. Different projects and materials call for different file structures, and designing with these needs in mind ensures your customers can assemble their crafts with ease.
Before we dive in, it’s important to understand what a layer is. When assembling cutting machine crafts, a layer is a design – or part of a design – that gets cut from a separate piece of material, such as vinyl, HTV, or cardstock. Some designs are simple single-layer files, while others combine multiple layers – or even use 3D construction techniques – to add detail and dimension.
Now let’s break down the different types of SVG cut files we can design, how they’re structured, and how they’re used with cutting machines like Cricut or laser cutters
Single Layer SVG Files
Single layer SVGs are designs that consist of a single layer, which means that the user will only need to assemble 1 layer of material to complete the design. Single Layer designs can range from simple shape silhouettes, to text designs, to more intricate graphics such as mandalas consisting of a single layer.
Here are a few examples of single layer SVG files that consist of only one color / layer:
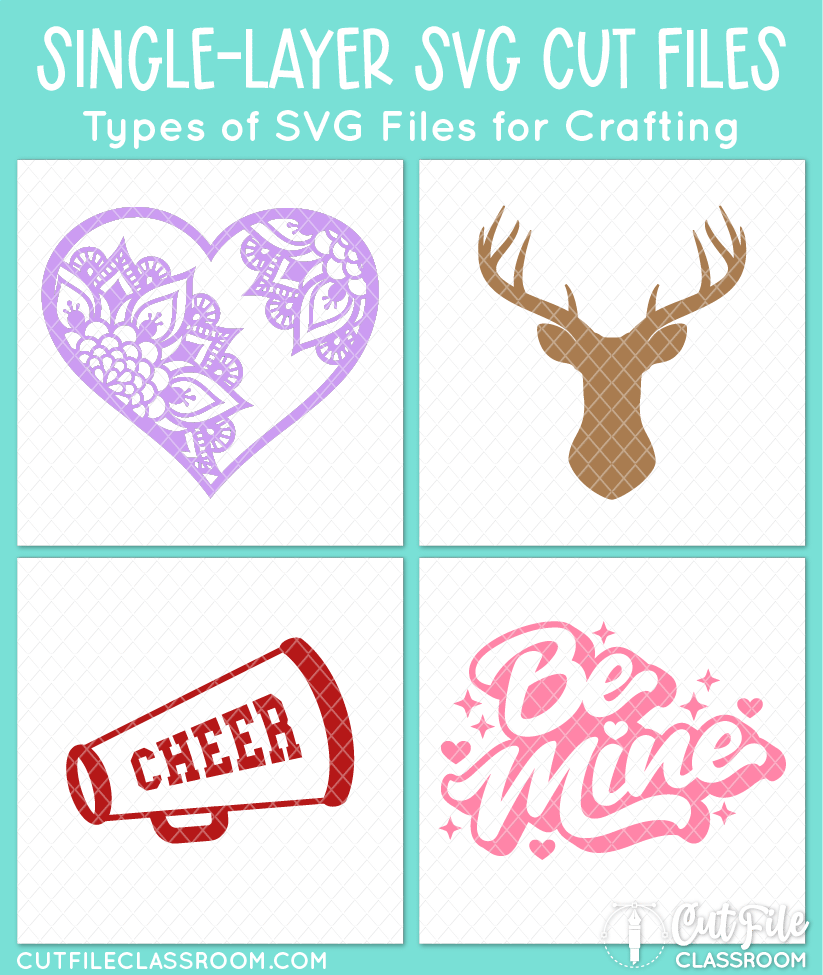
With single-layer SVGs, what you see is basically what you get. Since there aren’t other layers to assemble, single-layer SVGs are ideal for beginners, or for quick projects when short on time. For example, the Cheer Megaphone design above could be cut from a single piece of blue vinyl and applied to a water bottle for an easy beginner-friendly craft – or a last-minute project before heading to cheer practice.
Likewise the deer head design would be easy for a beginner to cut from a piece of red cardstock and adhere to a card or scrapbook page for an easy crafting win. A more experienced crafter might choose to use a simple design like this to combine with other elements, or to allow for more time to be spent on other parts of the layout.
Multi-Layer SVG Files
Multi-layer SVGs are designs with multiple layers that are cut from separate pieces of material, and then combined with other pieces to make the full design. Typically, elements in a multi-layer SVG are separated by color or by detail.
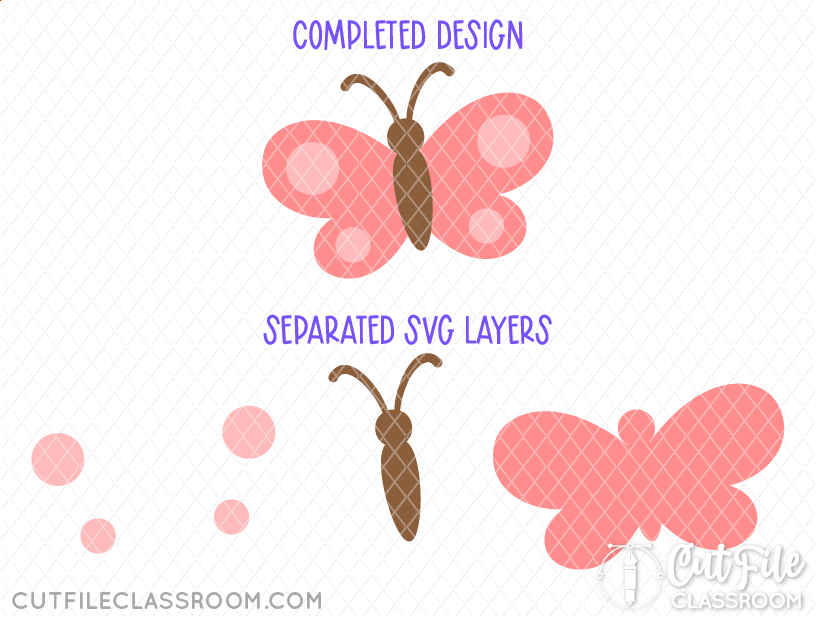
For example, this butterfly cut file consists of a light pink color, a medium pink color and brown. Each color would be cut from separate pieces of material for each color, and then assembled to form the completed design.
The Tropical Sunset design below is also considered a multi-layer SVG, even though the pieces of the design don’t touch or overlap one another. The user would still need to cut each color of this design from multiple pieces of material and then assemble them together to form the completed design.
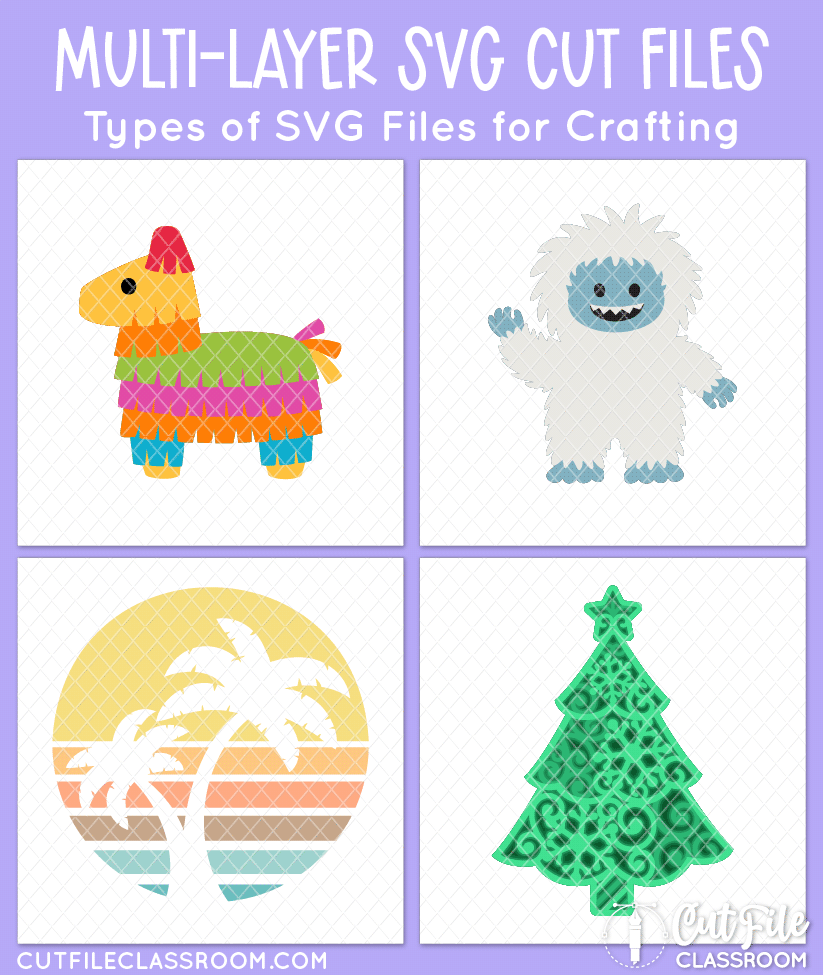
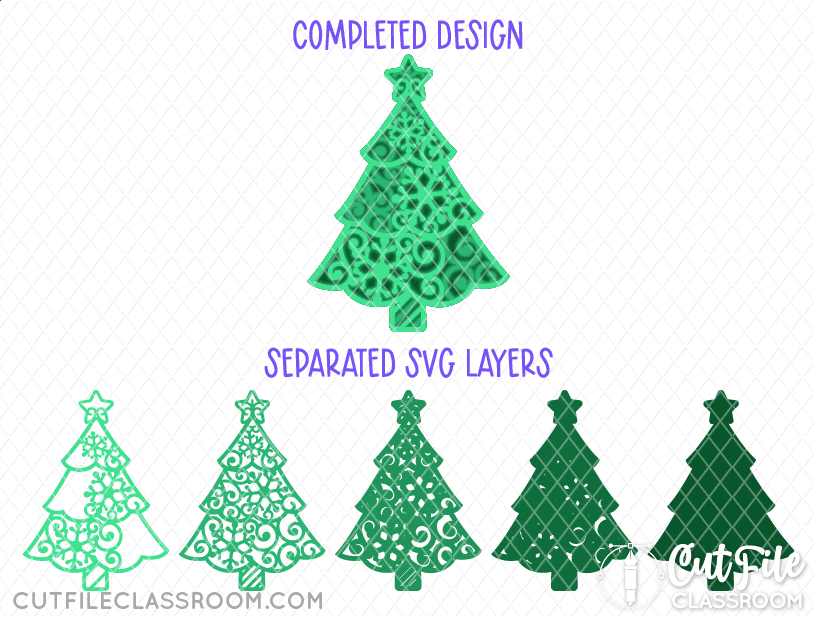
Likewise, the tree design, while shown in the preview image with multiple shades of green for visual clarity, could also be cut from a single shade of green but would still consist of multiple layers that need to be physically stacked to achieve the completed design. (This is often done with foam adhesive between the layers to create dimension.)
3D SVG Files
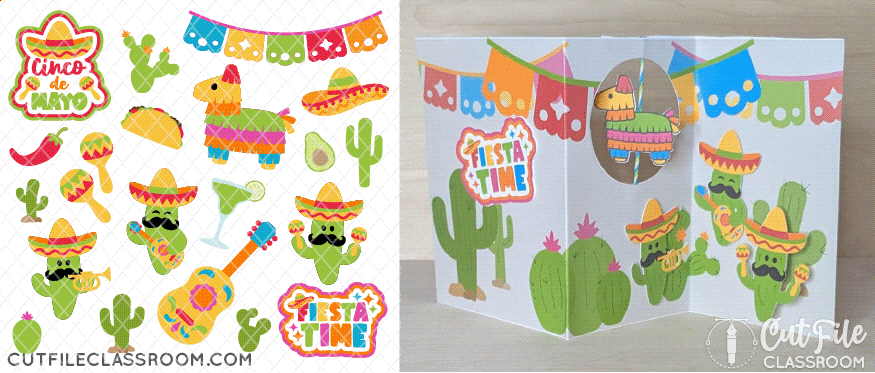
3D SVGs are designs (typically with score lines) that enable the material to be folded to create three-dimensional projects when assembled. Think gift boxes, cards, envelopes, and 3D paper sculptures.
Here are a few examples of 3D SVG files:

3D SVG files are generally designed to be cut from cardstock or paper, but I would also include sewing patterns for fabric / leather in this category as well. 3D SVG files can consist of a single layer (such as a simple envelope), or multiple layers that are pieced together, such as the heart shape card and rolled rose above.
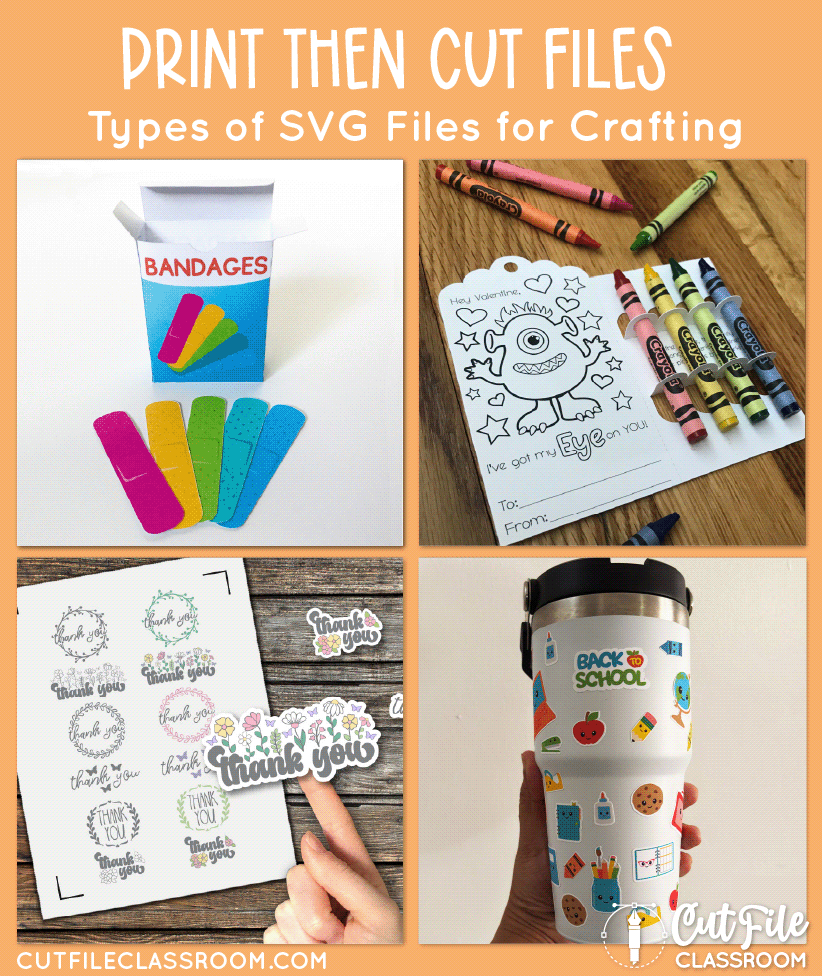
Print then Cut SVG Files
Print then Cut SVGs (also called “Print and Cut” files are designs that are intended to be printed with a printer, and then the printed image is loaded into a cutting machine, which cuts around the edges of the printed design. This type of SVG is used for stickers, labels, and detailed images that would either take more time to layer by color, or intricate images that wouldn’t work well as a cut-only design (such as a watercolor graphic, or other raster image).
While SVGs structured to be cut from multiple layers can also be used for Print then Cut, SVG designers can also prepare files specifically for Print then Cut by arranging multiple designs on a page to create a “sticker sheet”, or creating a cuttable shape or offset around a design.
Here are a few examples of files designed for Print then Cut with a cutting machine:
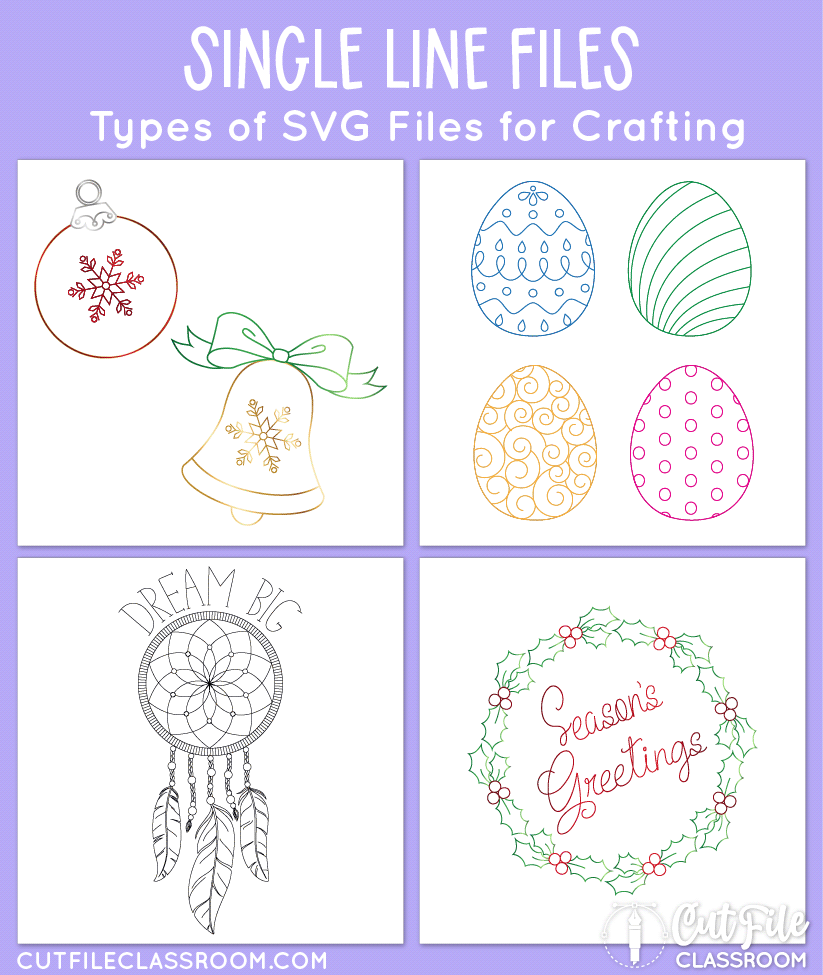
Single Line SVG Files
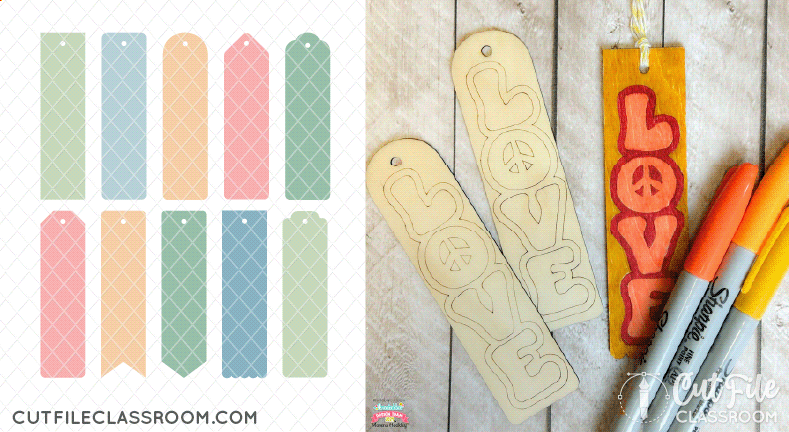
Single Line SVGs (also known as “Draw SVGs” or “Sketch Files”) are SVG designs that can be drawn or written using a pen or foiling tool that inserts into cutting machines. Single Line SVGs are created using open vector paths, that a pen or foiling tool can follow to “draw” an image.
Single line SVGs are popular for creating cards, labels, coloring images, and more!
Here are some examples of single line SVG files:
Laser Cut Files
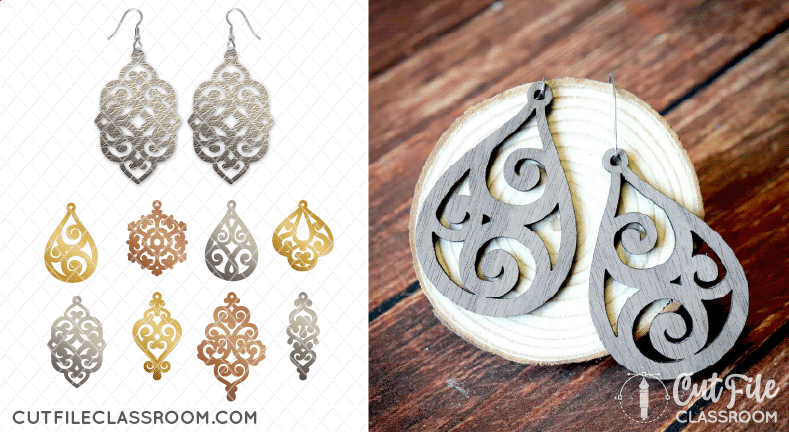
Laser Cut Files (also called “Laser files” or “Laser SVG Files”) are designs created to be used with a laser cutting machine (like XTool or Glowforge). While some of the basic principles of SVG design also apply; laser files have their own special considerations in order to be easy to use with lasers.
Here are a few examples of Laser SVG Files:
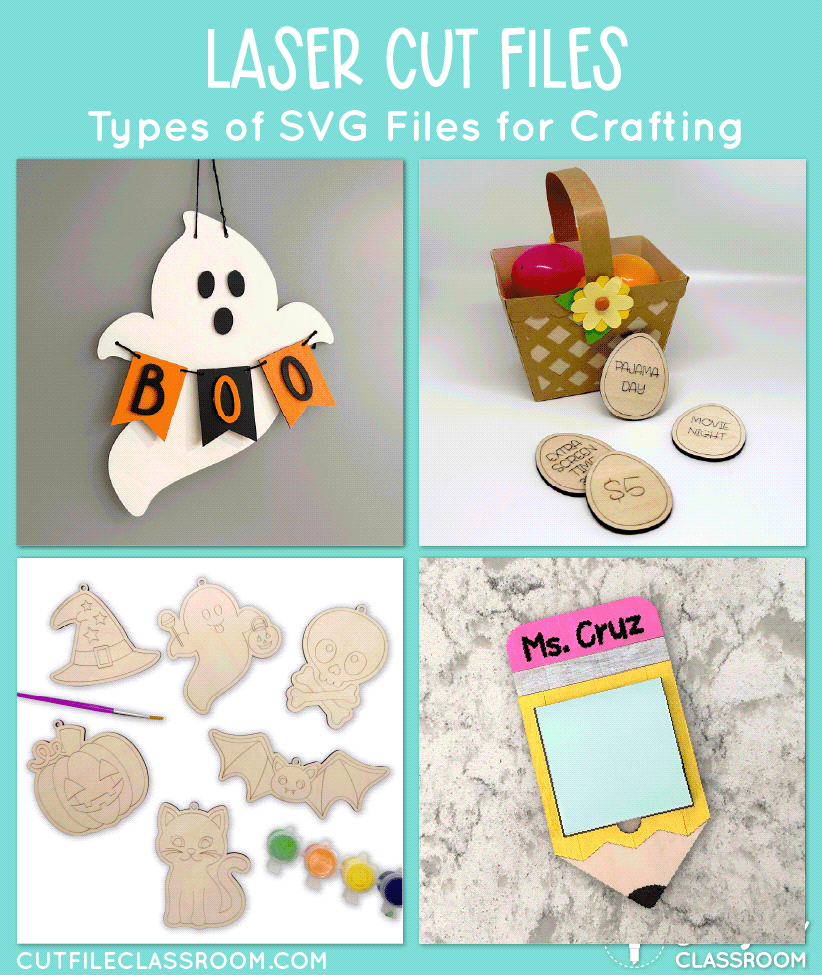
Many laser machines have the ability to cut, score, or engrave materials such as wood, acrylic, and leather, and can engrave or score materials like metal, glass, and silicone. As designers, we can design laser files with these specific operations in mind for a variety of finished projects from door signs, to ornaments, to boxes, keychains, and more!
Blurring the Lines
Keep in mind that an SVG design can belong to more than one of these categories. Combining different types of SVGs gives crafters more versatile options, and helps your designs stand out. For example, this bandage box is designed to print the box graphic on a printer, but also has score lines to fold and create a box, so it’s a Print then Cut design but also a 3D SVG.

Single line SVG files are also often used on 3D projects such as cards and envelopes, and they can also be used for “score” projects on laser machines.
A multi-layer file could also be used for Print then Cut by choosing specific settings within the cutting software. Even if an SVG design was created to be cut and layered from different colors, crafters can still choose to use it as a Print and Cut to save layering time and materials!
Some single layer SVG files such as the bookmark templates or earrings below can also be used as laser cut files with laser machines like XTool or Glowforge (and some laser files can also be used with cutting machines – with a bit of vector know-how).
Tips for Designing Different Types of SVG Cut Files
When designing different types of SVG cut files for Cricut and other cutting machines, here’s a few things to keep in mind as you design, to ensure that your files are user-friendly:
- Consider the end-use of your design and create your files accordingly. Keep in mind that the layers in your design should often be created differently depending on the material it will be cut from. The structure of an SVG that will be cut from vinyl can be quite different than a file intended to be cut from cardstock or wood.
- Have an understanding of the type of material / project you’re designing for. If you want to make a 3D box, you should have some understanding of working with paper and adhesive. If designing for vinyl, understand how stacking too many colors/layers can add unwanted bulk. Testing and assembling the design yourself (or in an online file testing group) is ideal to make sure your file is high quality and ready to sell.
- Design complexity: if you’re just getting started with designing SVGs, I would recommend starting with single layer designs and simple multi-layer designs, consisting of only 2-3 colors. Then work your way up to more complex designs as you build your skills and confidence.
- Think about how user-friendly your file will be for beginners versus advanced crafters. If your file will be more complicated to assemble, include a PDF layering guide or video assembly instructions to make the process easier for your customer.
Well-designed SVG files create a better crafting experience – and happy crafters are more likely to return for more. Consistently delivering thoughtful, easy-to-use designs helps you build trust, grow your credibility, and stand out in a competitive market.
Now that you know the different types of SVG cut files for crafting, which one will you design first? Dive in to my free tutorials to learn how to make your own SVG files!


4 thoughts on “6 Different Types of SVG Cut Files for Crafting”
Thanks so very much for sharing your expertise! Fantastic content. 😀
My pleasure Susan – I’m so glad I could help! Please feel free to let me know if there’s anything in particular you’d like me to cover!
Yes, Kristin. I am a bit fuzzy about when to make compound paths in cut files. Also – when to expand designs. Many thanks!
Thanks Susan! Generally, you’ll want to make compound paths for same-colored areas of a design. For example, the 4 light pink “circles” in the multi-layered butterfly shown above would likely be made into a compound path which would treat those as a single shape. They would open on a single layer in programs like Cricut Design Space and would automatically preserve their placement on the mat when being cut (this is discussed on pg 12-13 of my Designer’s Guide to Error-Free SVGs).
Expanding is used for any “live” effects you may be using in your art (Effects menu, brushes, blends, etc.). When you use any of these features, they give the appearance of changing your artwork but if you switch to Outline view, you’ll see how the actual design would look to a cutting machine. Expanding will “commit” the changes, turning them into actual vector shapes that cutting machines can accurately read. I’ll be sure to include both of these topics in future posts / videos!