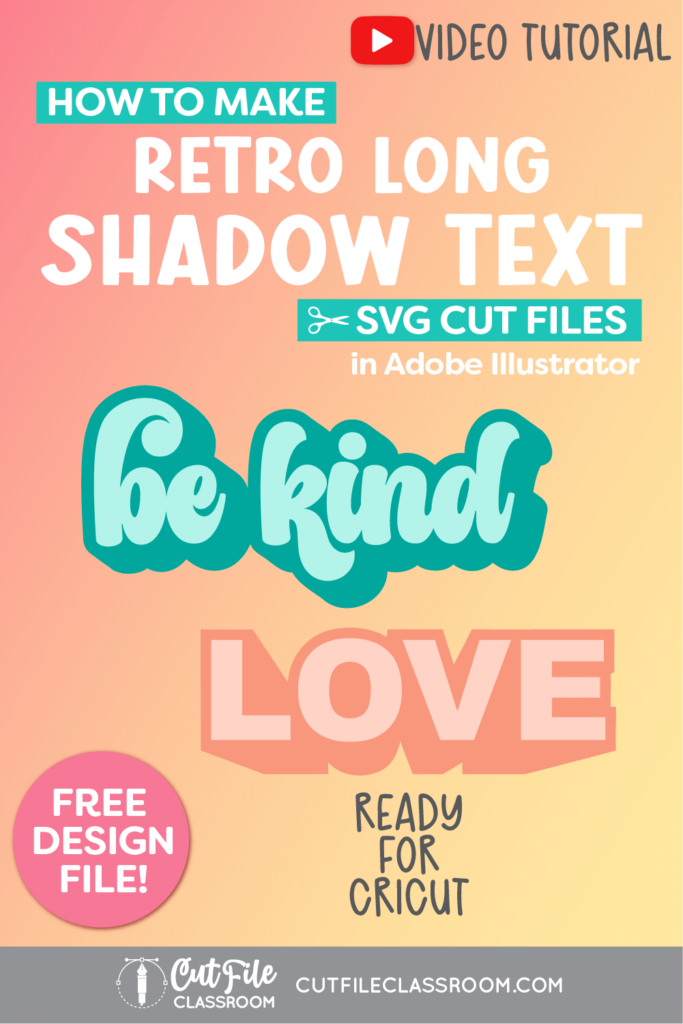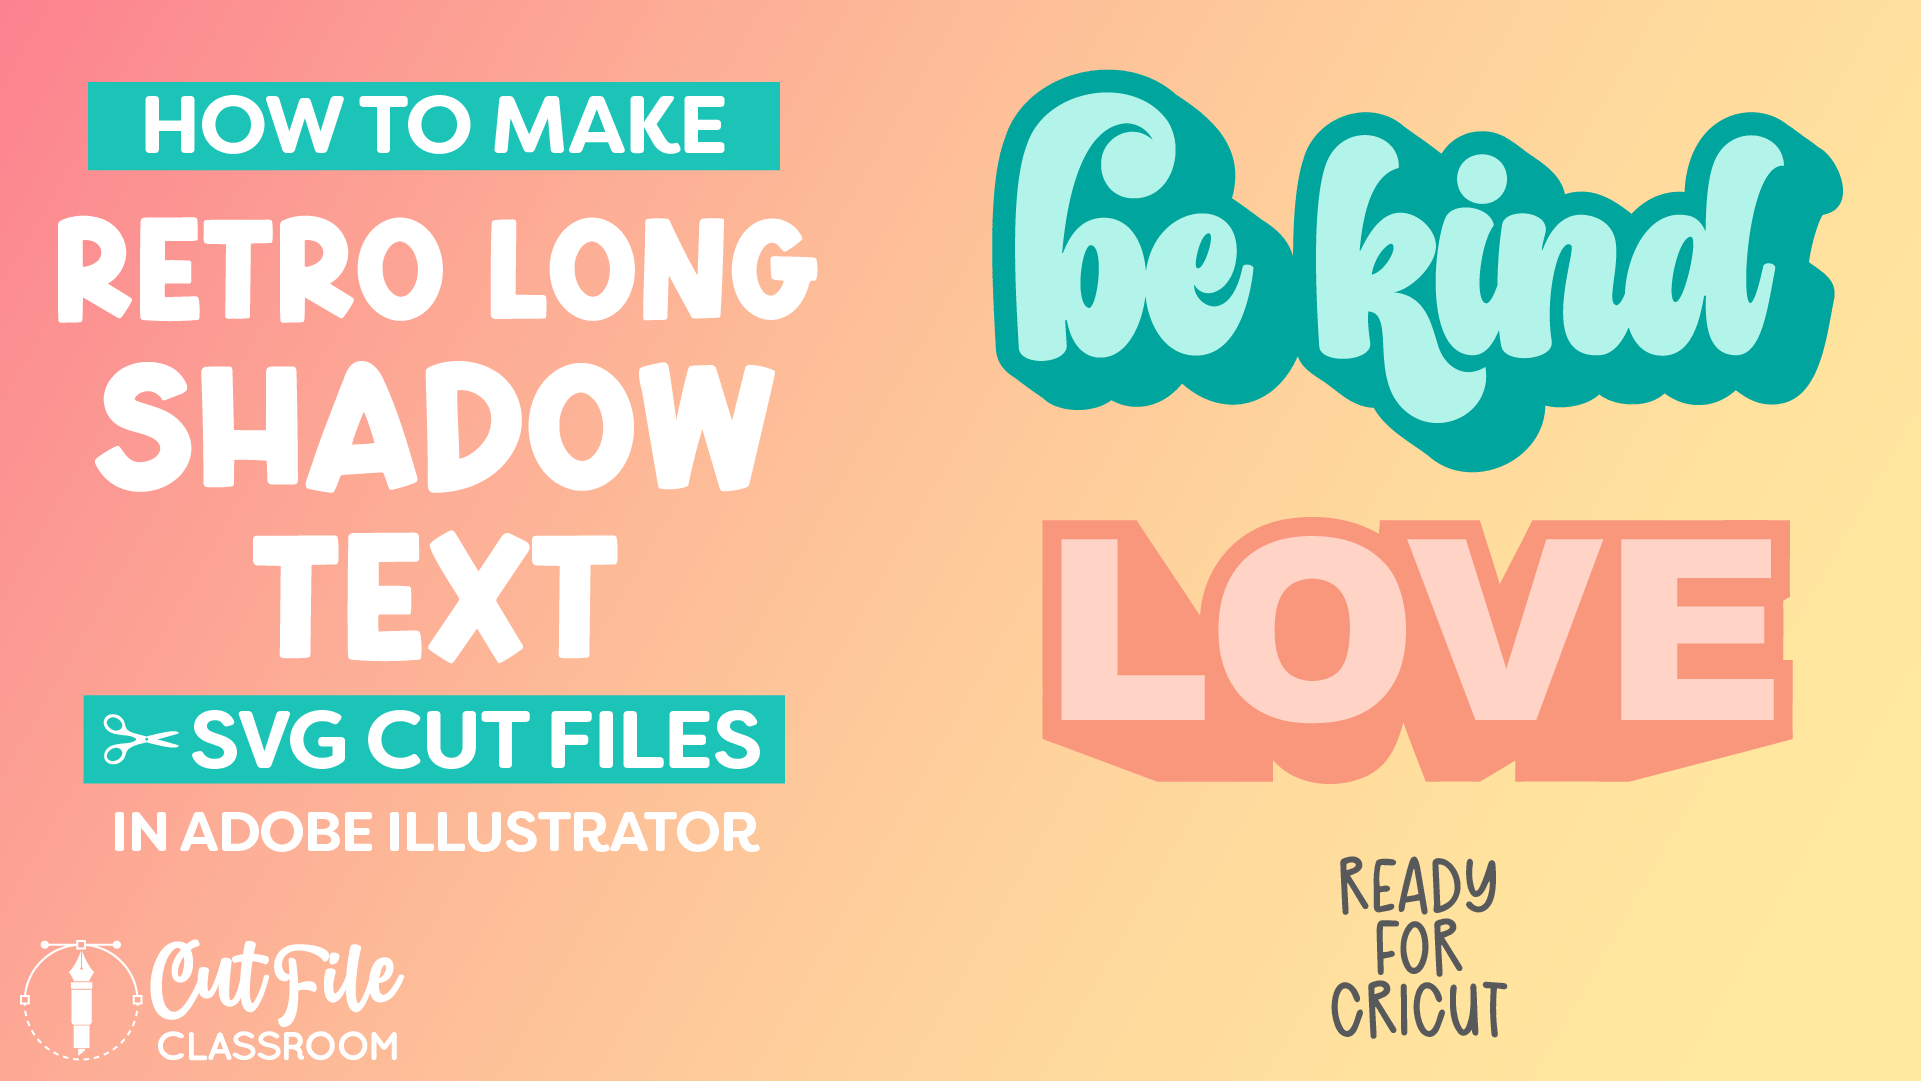
Adding shadow to text is a fun way of adding dimension and emphasis to text-based designs. Script or wavy retro text SVG designs often include an offset shadow, however block shadows can be added to any kind of text to make it really “pop”!
In this video, learn how to make Shadow Text SVG Cut Files in Adobe Illustrator. We’ll create 2 different types of shadow text designs: Retro Long Shadow text (with rounded edges), and 3D Block Shadow text (with hard, corner edges). We’ll create both shadow text SVG files from scratch, so they are clean and ready to cut with Cricut, Silhouette and other cutting machines.
There’s lots of videos showing how to create shadow text in Illustrator either using the 3D tool, or the Transform panel, but those methods rely on either leaving the finished artwork as a live effect, or involve a pretty hefty cleanup process to make them cuttable SVG files.
For SVG Cut Files that will be cut using a cutting machine, all parts of the finished cut file need to be actual vector shapes, with as few anchor points (nodes) as possible. This is the quickest and cleanest way that I’ve found to create block shadow text SVG files that are suitable for cutting machines like Cricut and Silhouette.
If you fancy adding another subscription to your life, then Astute Graphics has a nifty plugin that handles shadow text beautifully. But if you’re looking to create text shadows natively with just Illustrator, then give this method a try.
Video Tutorial: How to Make SVG Files – Shadow Text
If you prefer written step by step instructions instead of video, continue reading.
Download & Follow Along
Free Illustrator Practice File – CFC04:
To follow along and learn how to make Shadow Text SVG Cut Files for Cricut, download the free Adobe Illustrator practice file for this tutorial.
Includes the finished design, color palette, and live blend effects shown in this video.
Grab it from my Free Design Library: File# CFC04.
Want access to this free file? Join my FREE Design Library! All you need is the password, which you can get by filling out the form below!
Free Design Library!
Subscribe to my free newsletter and get instant access to my FREE Design Library, which includes this file and all other design tutorial files!
Enter your email and check your inbox for the password!
Fonts Used:
Written Overview: How to Make Shadow Text SVG Cut Files in Adobe Illustrator
Retro Long Shadow Text SVG files in Adobe Illustrator (curved edges):
- Press T on your keyboard to select the Type tool, and click on the artboard to begin typing the word you want for your design.
- Convert text into vector shapes by pressing CMMD SHIFT O on Mac / CTRL SHIFT O on Windows to Create Outlines of the text. Each letter will become a vector shape. (Don’t forget to save a copy of the Live text first, just in case you need to edit it later on!).
- Select overlapping letters and click Unite in the Pathfinder panel to connect (weld) them.
- Select the text and give it a nice fill color.
- With the text still selected, press CMMD 8 / CTRL 8 to make it a Compound Path.
- Right-click on the word and choose “Simplify” to clean up extra anchor points (nodes) before creating an offset.
- To create an offset around the text, choose OBJECT > PATH > OFFSET PATH from the top menu.
- Adjust your Offset settings and click OK. In this example, I set the offset to 0.15in with Round Corners (miter limit 4).
- An Offset will be created around your text. Give it a different fill color so it can stand out against the original text.
- Use Simplify to clean up extra anchor points in the offset.
- With the offset still selected, press ALT as you drag downward and slightly to the right to create a copy.
- Select the Blend tool from the Tool Panel and click on the original offset and then the offset copy, to create a copy in between.
- Double-click on the Blend tool, and in the the Blend options window, click “Specified Steps”, then change the number to however many copies you want, and click Preview to see how it looks. (In this example, I used 8 copies.)
- Note: the Blend that we just applied, is actually a Live Effect, meaning that we can drag around the offset copy to test out different angles for our shadow, and it will automatically update and adjust.
- However, to use this design as an SVG cut file, we need to “Expand” this effect – which will convert the blended copies into actual vector shapes. Using the Direct Section tool, click to select the blend, which is all 1 group, then head up to the Top Menu, and click Object > Blend > Expand.
- Now the copied offsets have each become separate vector shapes, so we need to combine them into a single vector shape that is friendly for cutting machines. With the offsets still selected, go to the Pathfinder panel and choose Unite.
- Right-click and choose Simplify to clean up extra nodes.
3D Block Shadow Text SVG files in Adobe Illustrator (hard, corner edges):
- Press T on your keyboard to select the Type tool, and click on the artboard to begin typing the word you want for your design using a block font.
- Convert text into vector shapes by pressing CMMD SHIFT O on Mac / CTRL SHIFT O on Windows to Create Outlines of the text. Each letter will become a vector shape. (Don’t forget to save a copy of the Live text off to the side first, just in case you need to edit it later on!).
- Select the text and give it a nice fill color.
- With the text still selected, press CMMD 8 / CTRL 8 to make it a Compound Path.
- Right-click on the word and choose “Simplify” to clean up extra anchor points (nodes) before creating an offset or shadow.
- Optional: To create an offset around the text, choose OBJECT > PATH > OFFSET PATH from the top menu. Adjust your Offset settings and click OK. For block shadow offsets, I set the offset to 0.15in and changed the Joins to “Mitered” (miter limit 4).
- An Offset will be created around your text. Give it a different fill color so it can stand out against the original text.
- Use Simplify to clean up extra anchor points in the offset.
(You can also use the following steps to create a shadow directly from your text without creating an offset first).
- With the offset selected, press ALT as you drag downward and slightly to the right to create a copy.
- Select the Blend tool from the Tool Panel and click on the original offset and then the offset copy, to create a copy in between.
- Double-click on the Blend tool, and in the the Blend options window, click “Specified Distance”, then set your desired distance, and click Preview to see how it looks. (In this example, I used 0.005 in.)
- Click OK to apply the Blend, which will create many many copies between the original offset and the copy. This is what creates the shadow effect.
- Note: the Blend that we just applied, is actually a Live Effect, meaning that we can drag around the offset copy to test out different angles for our shadow, and it will automatically update and adjust.
- However, to use this design as an SVG cut file, we need to “Expand” this effect – which will convert the blended copies into actual vector shapes. Using the Direct Section tool, click to select the blend, then head up to the Top Menu, and click Object > Blend > Expand.
- Now the copied offsets have each become separate vector shapes, so we need to combine them into a single vector shape that is friendly for cutting machines. With the offsets still selected, go to the Pathfinder panel and choose Unite. – NOTE: Depending on your computer’s processing power, this step may take some time to render.
- Now the offset shadow is a single vector shape, but there are many extra nodes that form jagged lines which we need to clean up.
- Choose the “Smooth” tool (located under the Pencil tool in the Tool panel).
- Double-click the Smooth tool and set the Fidelity to “Accurate”.
- Using the Smooth tool, click ONCE on the outer edge of the shadow to clean up the jagged lines and extra nodes.
- Now we can right-click and use Simplify to further clean up nodes. You may need to adjust your previous Simplify settings to preserve as many sharp corners as possible. In this example, I increased the Corner Point Angle Threshold to 180 degrees, and reduced the Simplify Curve to 84%
- The caveat to this, is that some corners may end up curved, so you may need to do some manual editing.
- Use the Anchor Point Tool (hidden under the Pen tool) and click on curve anchor points to change them from curves to straight paths as needed.
Now these Long Shadow Text designs are all ready to Save as SVG files!
Give this a try and come share your finished SVG designs (and any questions) in my free Facebook Group!
If you found this SVG design tutorial helpful, Pin the image below to come back later, and to help other SVG designers learn how to make Shadow Text SVG Cut Files!